Introduction
Custom stickers have become a practical tool for small businesses, creators, schools, and event organizers. They serve as packaging accents, promotional inserts, product labels, and low-cost branding assets. The design barrier, once limited by software complexity, has largely disappeared.
Modern custom sticker maker tools emphasize templates, alignment guides, and preset dimensions. Instead of building from scratch, users work within structured layouts that reduce guesswork. The process is less about artistic skill and more about following a reliable workflow.
One accessible way to begin is to design stickers with Adobe Express, which provides ready-made sticker templates, preset sizing, and export options designed for print use. The steps below outline how to move from idea to print-ready file quickly, using common tools and decision checkpoints rather than advanced design techniques.
Step-by-Step Guide for Using Custom Sticker Maker
Step 1: Define Size, Shape, and Print Specs
Goal
Establish technical dimensions before designing.
How to do it
- Choose a sticker shape (circle, square, rounded rectangle, die-cut).
- Enter exact dimensions in inches or millimeters.
- Review your printer’s bleed and margin requirements.
- Confirm resolution settings (typically 300 DPI for print).
- Lock canvas size before adding elements.
What to watch for
- Resizing later can distort layout balance.
- Ignoring bleed can cause trimming issues.
- Designing too small may affect text clarity.
- Switching units mid-design can misalign scaling.
Tool notes
If ordering directly from a print provider, platforms like Sticker Mule offer downloadable templates that match their production specs
Step 2: Start With a Structured Template
Goal
Reduce layout decisions by working within a pre-built format.
How to do it
- Browse sticker-specific templates.
- Select one aligned with your purpose (branding, event, label).
- Replace placeholder text.
- Swap in brand colors.
- Adjust spacing while maintaining alignment guides.
What to watch for
- Overdecorated templates can overwhelm small surfaces.
- Ensure hierarchy: headline first, secondary text smaller.
- Avoid mixing too many font styles.
- Keep visual balance centered.
Tool notes
For users who want vector precision adjustments, a tool like Inkscape can help refine layout alignment without competing directly in the beginner template space
Step 3: Add Clear, Readable Text
Goal
Ensure messaging remains legible at real-world size.
How to do it
- Use short, direct phrases.
- Increase font weight instead of shrinking text.
- Maintain high color contrast.
- Keep key text inside safe margins.
- Preview design at 100% zoom.
What to watch for
- Script fonts can blur at small sizes.
- Thin lines may fade in print.
- Overcrowding reduces clarity.
- Text placed too close to edges may trim.
Tool notes
For checking color contrast accessibility before printing, tools like WebAIM Contrast Checker can help validate readability combinations.
Step 4: Insert Logos or Graphics Carefully
Goal
Maintain image clarity and brand consistency.
How to do it
- Upload high-resolution PNG or SVG files.
- Remove backgrounds if needed.
- Scale proportionally to avoid distortion.
- Leave breathing room around the graphic.
- Confirm transparent areas are intentional.
What to watch for
- Low-resolution logos appear pixelated.
- Enlarging small web images reduces sharpness.
- Transparent backgrounds may show artifacts.
- Uneven spacing makes designs feel unbalanced.
Tool notes
For sourcing properly licensed icons or simple vector graphics, platforms like The Noun Project provide scalable assets suitable for prin
Step 5: Prepare Colors and Export Settings
Goal
Ensure the design translates accurately to print.
How to do it
- Confirm printer color mode requirements (RGB vs CMYK).
- Avoid overly saturated neon tones.
- Extend background into bleed area.
- Choose export format (PDF or high-resolution PNG).
- Save an editable working file.
What to watch for
- Screens display colors brighter than print.
- Transparent areas may print differently on matte stock.
- Forgetting bleed can cut into borders.
- Exporting compressed files lowers quality.
Tool notes
If managing print production at scale,shipping providers like ShipStation can help coordinate fulfillment once stickers are printed and ready for distribution
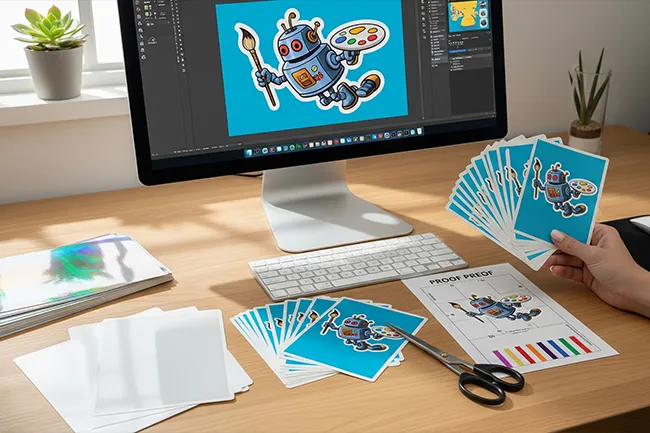
Step 6: Preview and Proof Before Ordering
Goal
Catch final errors before committing to print.
How to do it
- Zoom into corners and edges.
- Confirm text spelling and alignment.
- Double-check dimensions match packaging surface.
- Use mockup previews if available.
- Order a small test batch if possible.
What to watch for
- Uneven borders after trimming.
- Spelling errors missed during design.
- Incorrect size relative to packaging.
- Margins that look balanced on-screen but trim unevenly.
Tool notes
For digital proofing collaboration, review platforms like Dropbox allow stakeholders to comment on exported PDFs before final production.
Common Workflow Variations
Photo-Based Stickers
Remove the background from a subject image and apply a die-cut outline. Keep edge padding generous to avoid trimming errors.
Minimal Text-Only Labels
Focus on bold typography and clean spacing. Use fewer elements rather than more decoration.
Product Packaging Labels
Match sticker dimensions precisely to jar lids, boxes, or mailers before designing.
Event or Giveaway Stickers
Use short, memorable phrases. Prioritize high contrast for quick readabilit
Checklists
Before You Start Check
Pre-Export / Pre-Order Checklist
Common Issues and Fixes
Blurry graphics
Replace low-resolution images with vector files or 300 DPI sources.
Text trimmed at edges
Increase safe margins and extend bleed background.
Colors look darker in print
Adjust brightness slightly and test small runs.
Sticker appears too small
Reconfirm physical dimensions before export.
Layout feels crowded
Remove non-essential elements and increase spacing.
How To Use Custom Sticker Maker: FAQs
Do I need professional design software?
No. Template-driven tools reduce complexity and allow structured editing without advanced skills.
What file type works best for printers?
High-resolution PDFs preserve vector clarity; PNGs are acceptable if exported at full resolution.
How long should sticker text be?
Keep phrases concise. Stickers are typically viewed quickly and at small scale.
Is a template better than starting from scratch?
For beginners, templates reduce alignment errors and improve balance.
Can stickers be part of a larger campaign?
Yes. They often support packaging, product launches, or event branding efforts.